
Ewell case has come, miniPC not be far behind
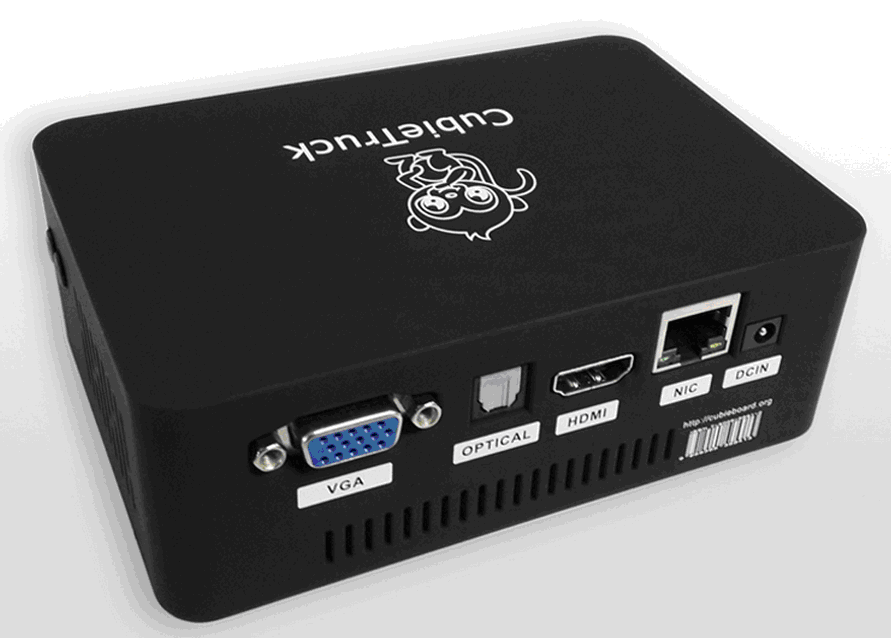
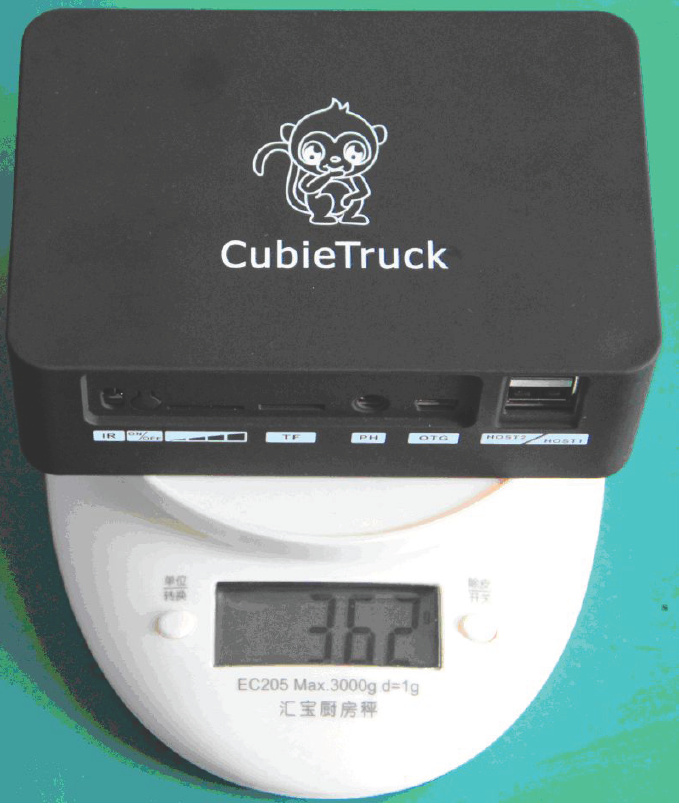
Cubietruck’s Ewell case is the first one specifically designed for Cubieboard 3 and it makes Cubietruck become a high-end and classy commercialized MiniPC product. Ewell case can support a 5300 mAh lithium battery and a 2.5-inch mechanical hard disk drive or solid state drive. The entire product has a net weight of 362g and you can definitely feel its weight when you hold it in hands, which makes me fond of it very much. I have followed up the whole design process of this case. After two major modifications, we are basically satisfied with the third version. After a long process, we finally have the chance to present it to Cubieboard fans. I have made several times of trial installation after I got the production version. Here is the recording of the whole installation process for your reference.
Ⅰ. Accessories and tools
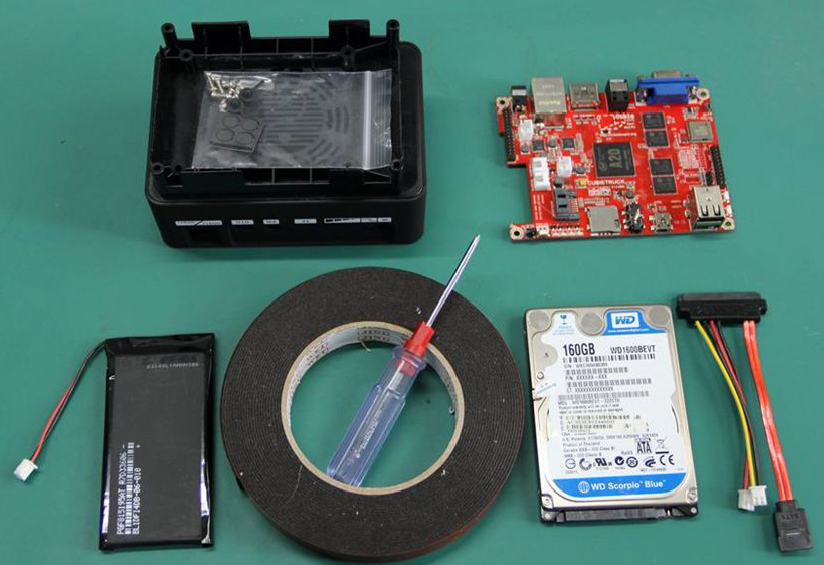
1. One piece of Cubietruck mainboard
2. One set of Ewell case
3. One 5300 mAh lithium battery, with 2.54mm of 2-pin plug, which also can be made by yourself.
4. 2.5-inch hard disk drive (SSD is better due to its faster reading, better resistance to vibration, lower power consumption).
5. One SATA wire, which is included in the standard package of Cubietruck
Tools:
6. Prepare a roll of foam rubber to stick battery. Try to buy the product with better quality and stickiness. Usually you can buy it in the stationery shop in China.
7. 3-mm Phillips screwdriver. Remember the specification: 3-mm cross-shaped.
Ⅱ.Installation process recording

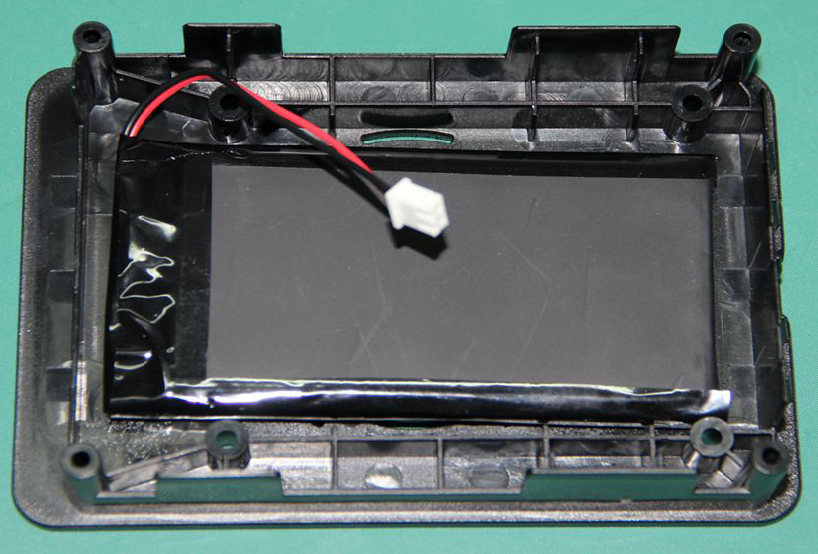
1. Stick the lithium battery
Use the scissors to cut two trips of foam rubber and attached them to the bottom cover of the Ewell case. You should control the length of the foam rubber properly. After attaching the foam rubber to the lithium battery, pay attention to the direction to stick the battery. Just follow the direction in the photo below.
Notice: If the battery is installed in the wrong direction, the battery cable will not be long enough, which will make it impossible to continue the installation.
2. Install the hard disk drive
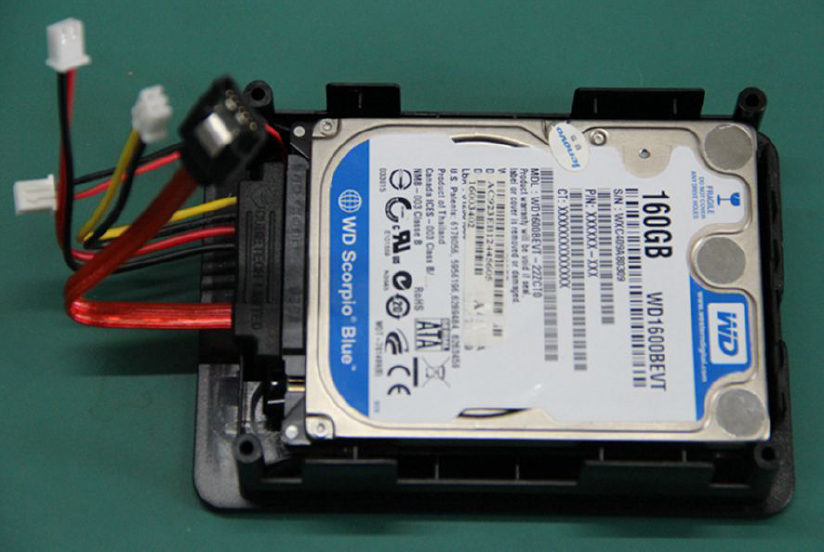 It is relatively simple to install the hard disk drive. The Ewell case is designed with a 2.5-inch hard disk drive bay and 3.5-inch hard disk drive is not supported. Put the hard disk drive at the right place as shown in the photos above and then lock it with short screws in the back, as shown below. The short screws are provided in the accessories package of the Ewell case.
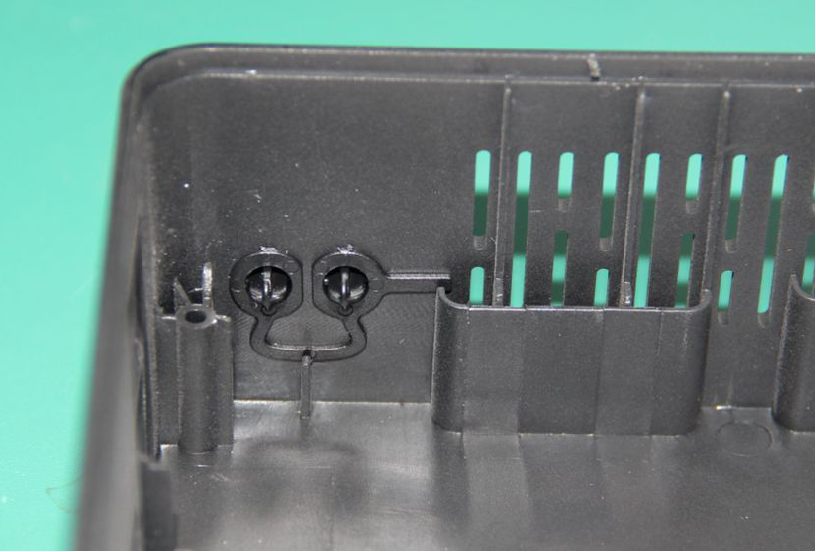
3. Install the button for resetting and updating
Install the button according to way shown above. The conjoined button is placed on the top, which takes not much difficulty. Please note that the LED light guide bar may not be installed for the moment, which will not affect the normal use. If you have to install it, you may need to find someone else to help you to fix the light guide bar. Otherwise, the brute force may easily damage the keys on the PCB main board.
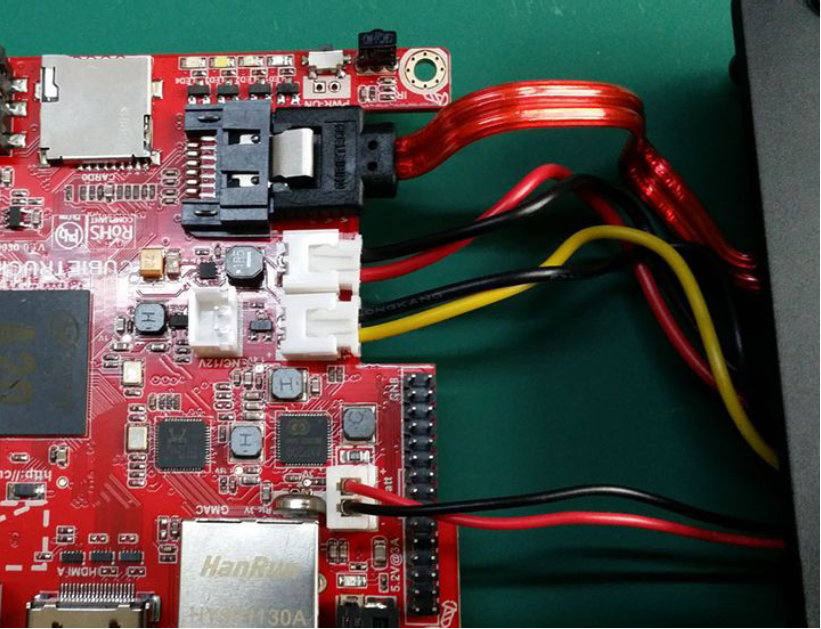
4. Connect the battery and hard disk drive
Connect the battery, hard disk drive with the circuit board before putting the Cubietruck main board into the Ewell case. There are 4 sets of wires to be connected, as shown below: directly insert the SATA data cable into the corresponding black connector, the red and black 5V power cord into the middle 5V connector, yellow and black 12V power cord into the 12V connector below (this 12V power line virtually does not work in the 2.5 -inch hard disk drive, here we just put it in the right place only), red and black battery cable into the corresponding lithium battery socket.
5. Install Cubietruck circuit board
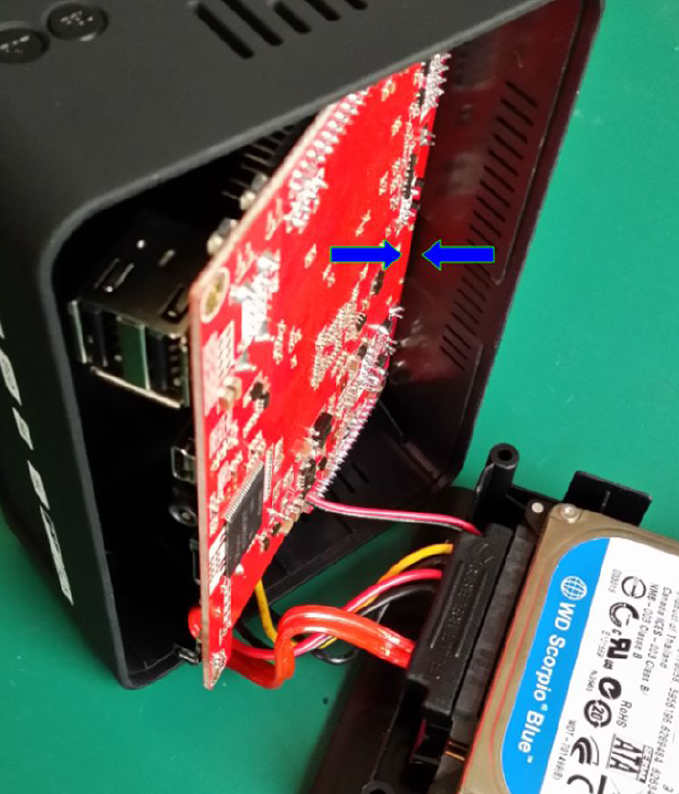
The next step is to put the circuit board into the case, which I think is the step requiring highest skills. First, there is only one allowable way to place the Cubietruck circuit board into the Ewell case. Be sure to make the network port VGA side (the rear edge circuit board) get in first and the USB base side (the front edge of circuit board) get in last. Prior to pressing down the front edge of circuit board especially the USB base, ensure the board edges are in close contact with the interior of Ewell case with no gap, as shown by arrows in the following figure. If it is your first time to install, it is recommended to make a trial installation without connecting the battery and hard disk drive because it will become much more difficult with them connected.

I finished the installation single-handedly, so I just put the relatively heavy bottom case on the table and put the lighter top case standing up in order to complete the installation. Once again, first fully put the rear edge of the board into the case, and then the front edge. Ensure the conjoined button is at the right place before putting the front side in. After the Cubietruck circuit board is completely in, check whether the each key is in normal state, and then check whether each interface is in the right position. If there is no problem, you can fix the cover with screws. Before fixing the cover, tidy up the wires and ensure they stay in good order in the case.
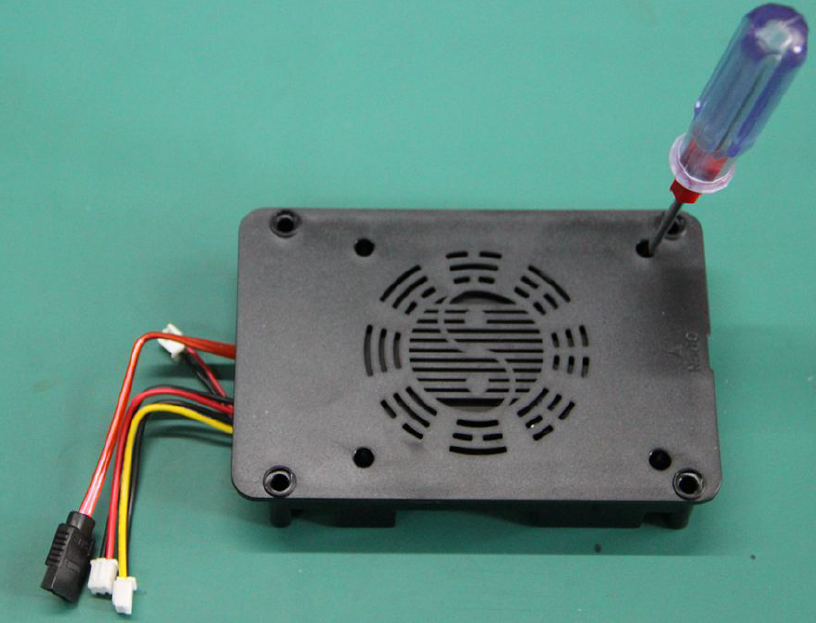
6. Fix the rear cover with screws and attach the non-slip mat
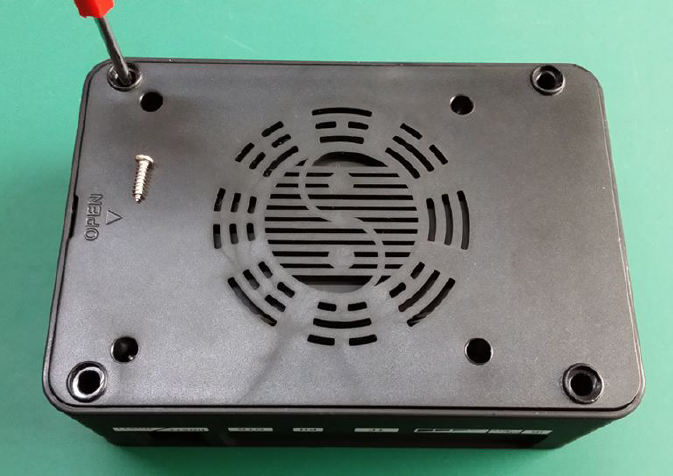
After the necessary check, you can fix the rear cover with screws. Use four slightly longer screws, as shown in the photos below:
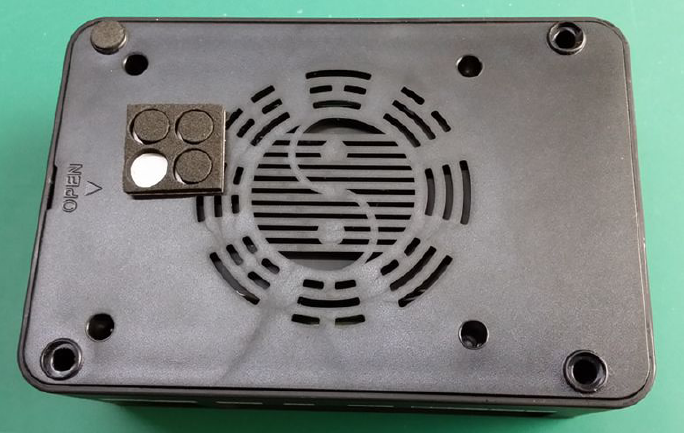
After fix the screws, the final step is to attach the non-slip mat. The whole process takes about 20 minutes with a total of six steps. If it is your first time to install it, be careful and take your time. Do not damage the circuit board. If the power key doesn’t work after installation, it may be caused by battery protection. You need to use DC5V power supply to break through the battery protection board.
Please click here to download the PDF version. It includes both English and Chinese language.
If you want to discuss this topic in Chinese forum, please come here.
Leave a Reply
You must be logged in to post a comment.